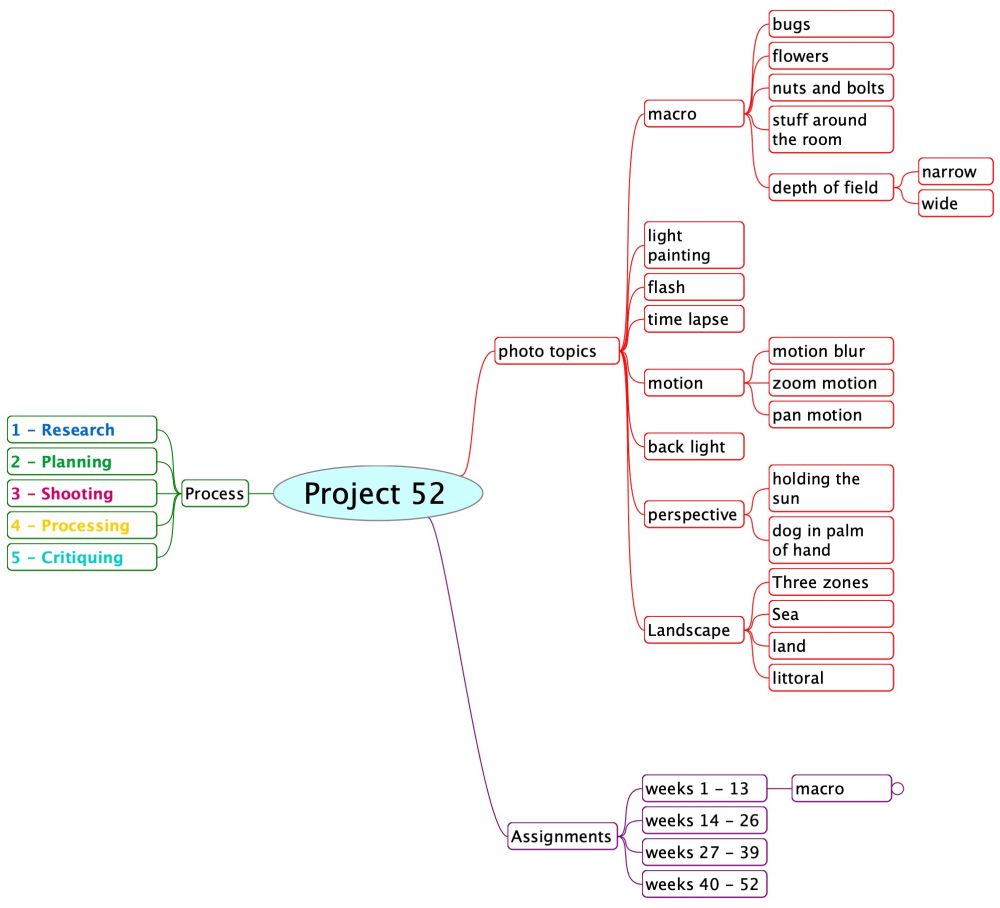
Research:
In my research phase I found many sources on YouTube that describe the basics of macro photography. Below are links to the ones that I found to be helpful.
Basically you can use a lens made for macro photography, known surprisingly as a "macro lens", or you can take your regular lens and turn it around and mount it backwards using a special filter adapter, or lastly you can use a set of extension tubes that go between your camera and your lens.
If you want the maximum depth of field (because in macro photography the depth of field is very small) you need to use the smallest aperture. This means that you will need to decrease the shutter speed significantly for ambient lighting or use a flash. If using a slow shutter speed and ambient lighting, you will also need to use a tripod. A tripod is fine for fixed subjects, but for shooting bugs or moving objects outside, a flash is less cumbersome. If you have a bright sunny day and use a higher ISO, you can get away without a flash or tripod.
Planning
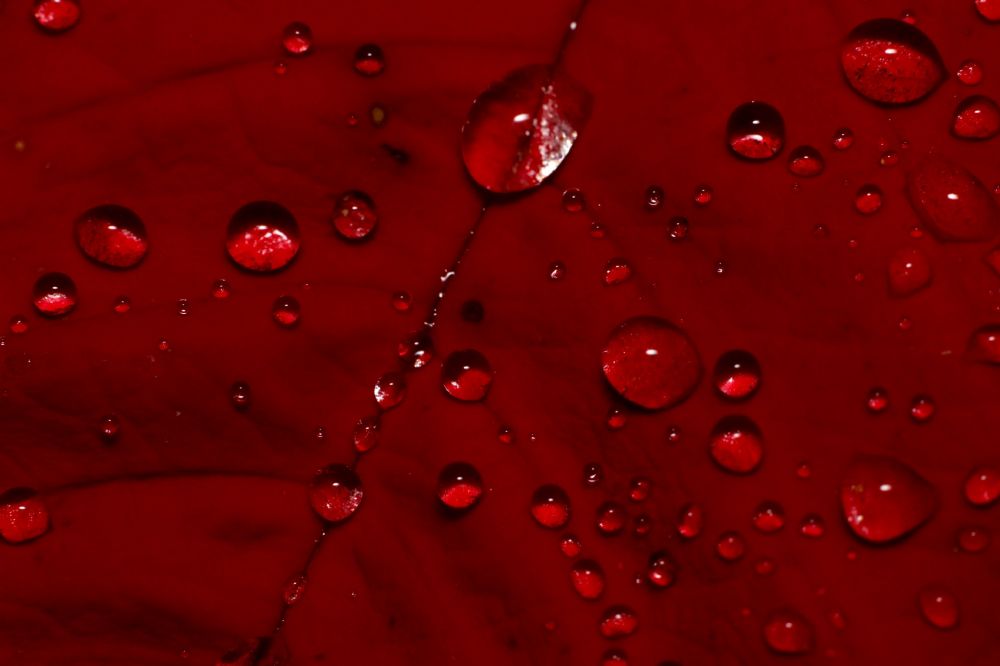
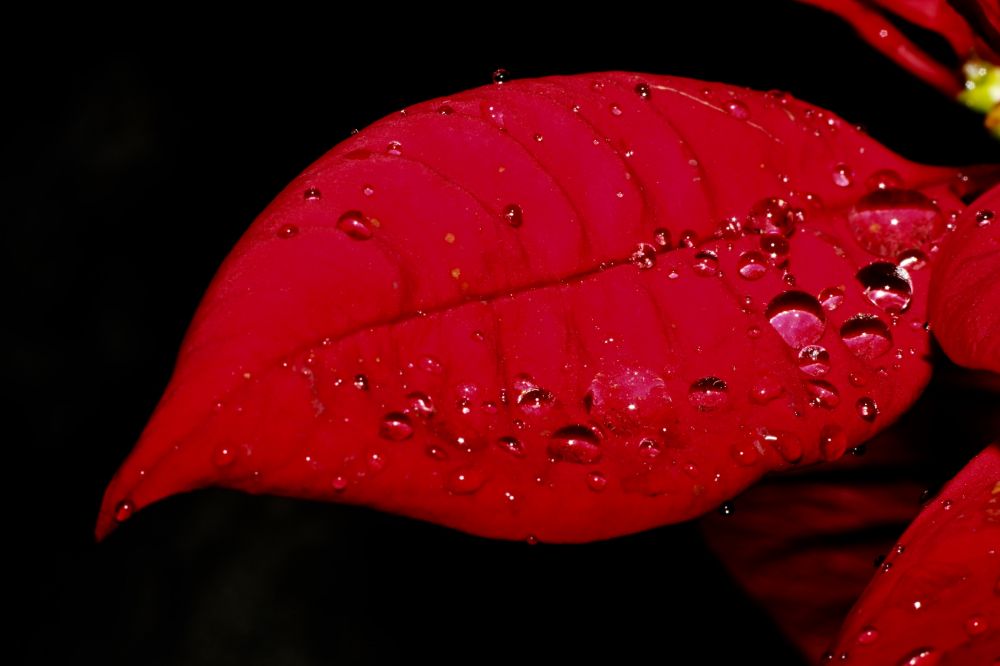
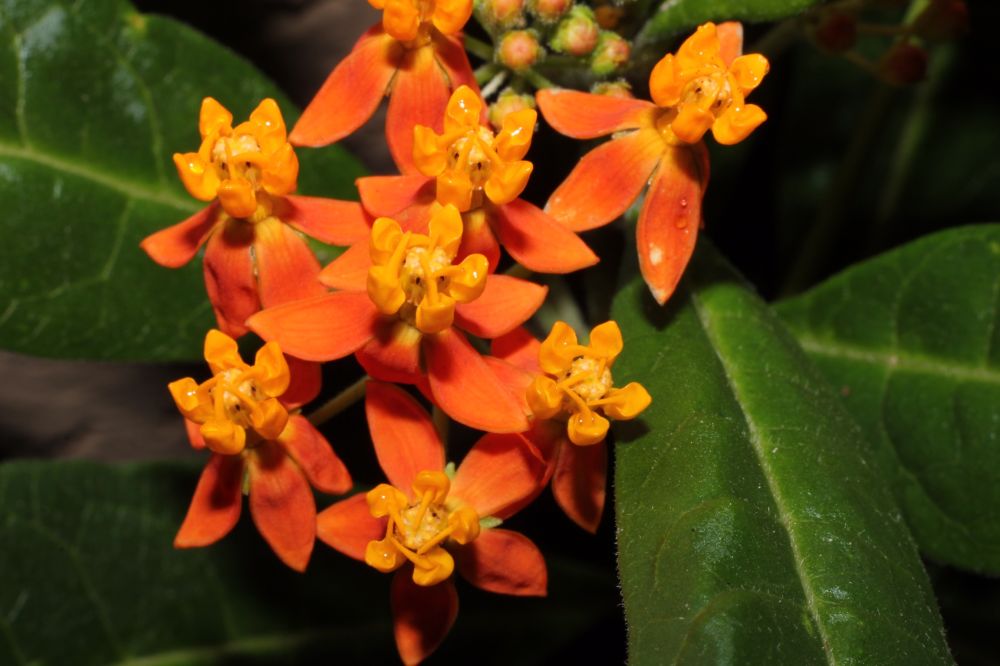
I already had a set of extension tubes and I've found them to be the most flexible and cheapest way to go, so that is what I planned to use. My set comes with three different sizes that you can use individually or combine them to get a multitude of magnification factors. My plan was to take several shots both indoors and outside, with and without a flash, and at several aperture settings for various amounts of depth of field.
Shooting
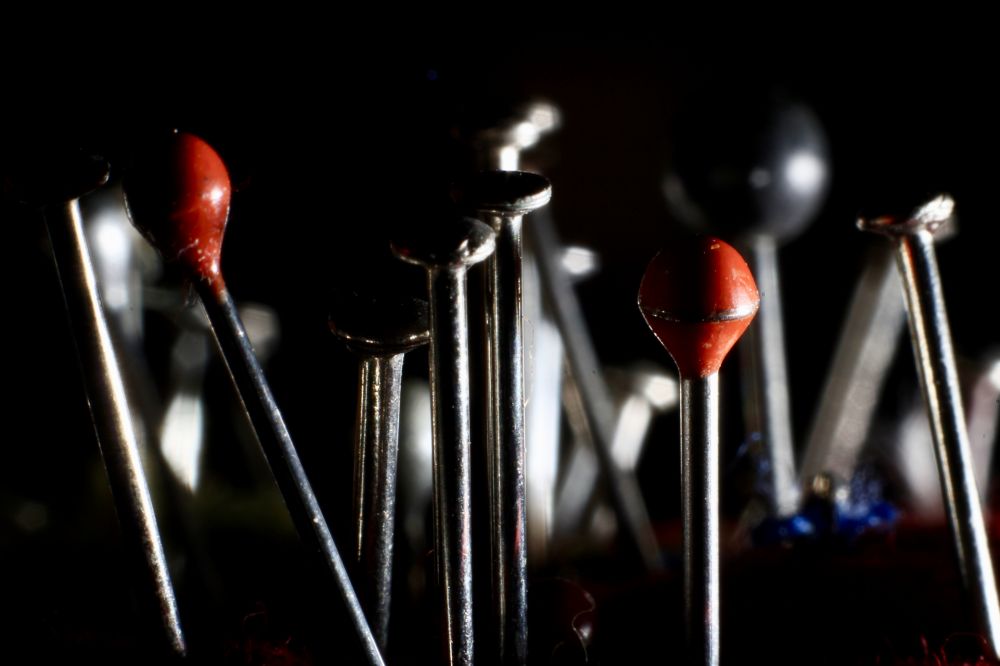
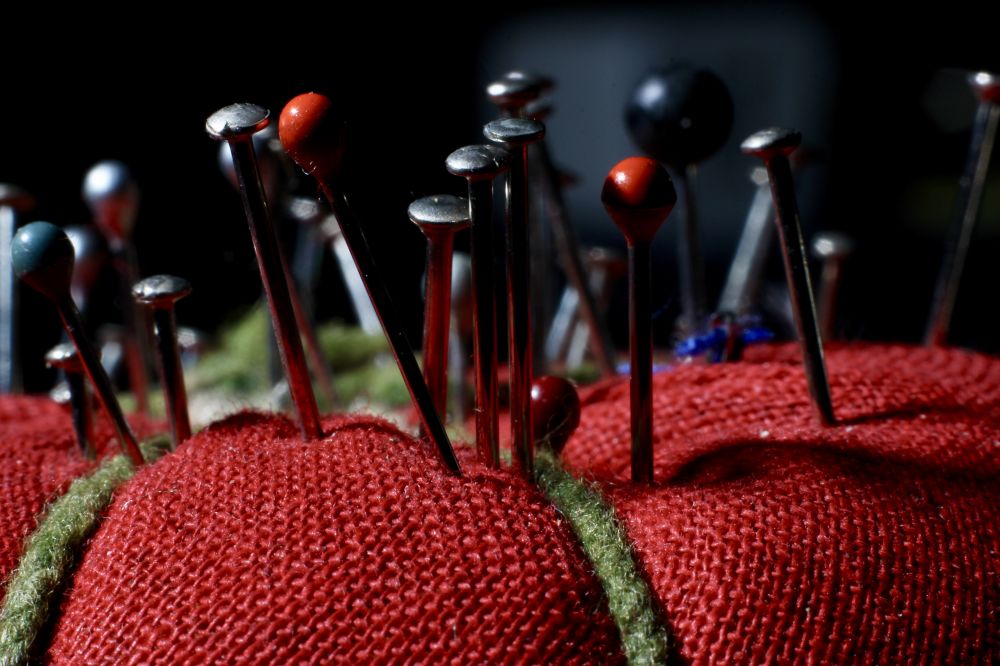
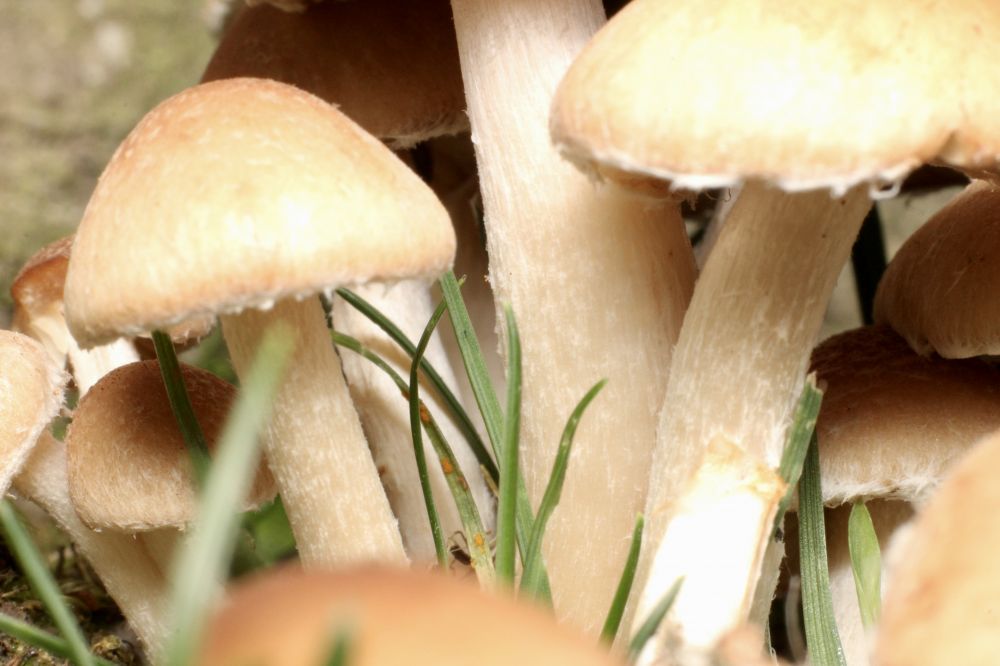
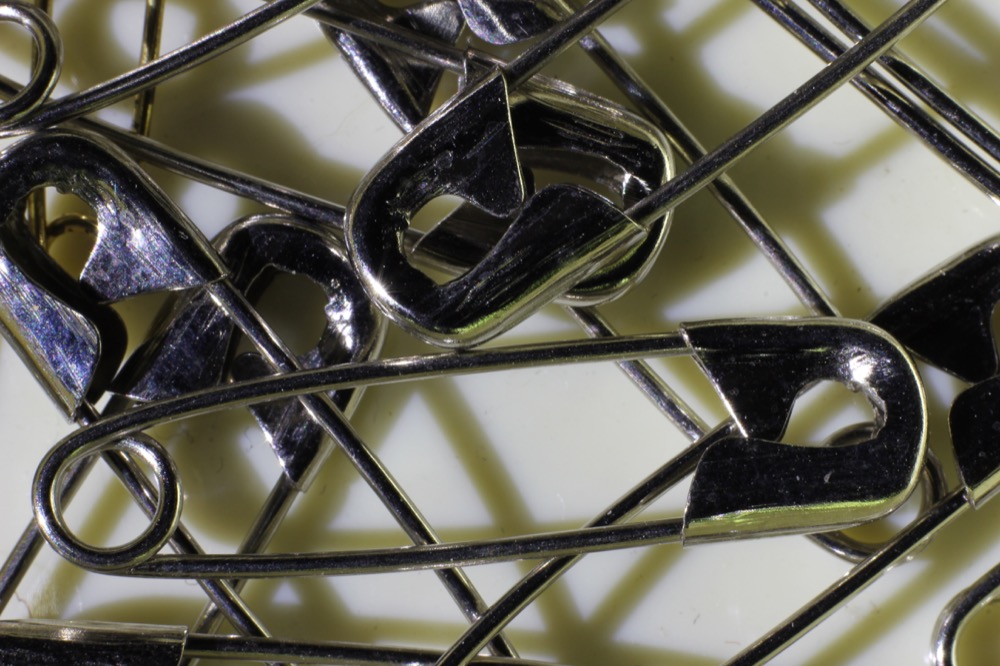
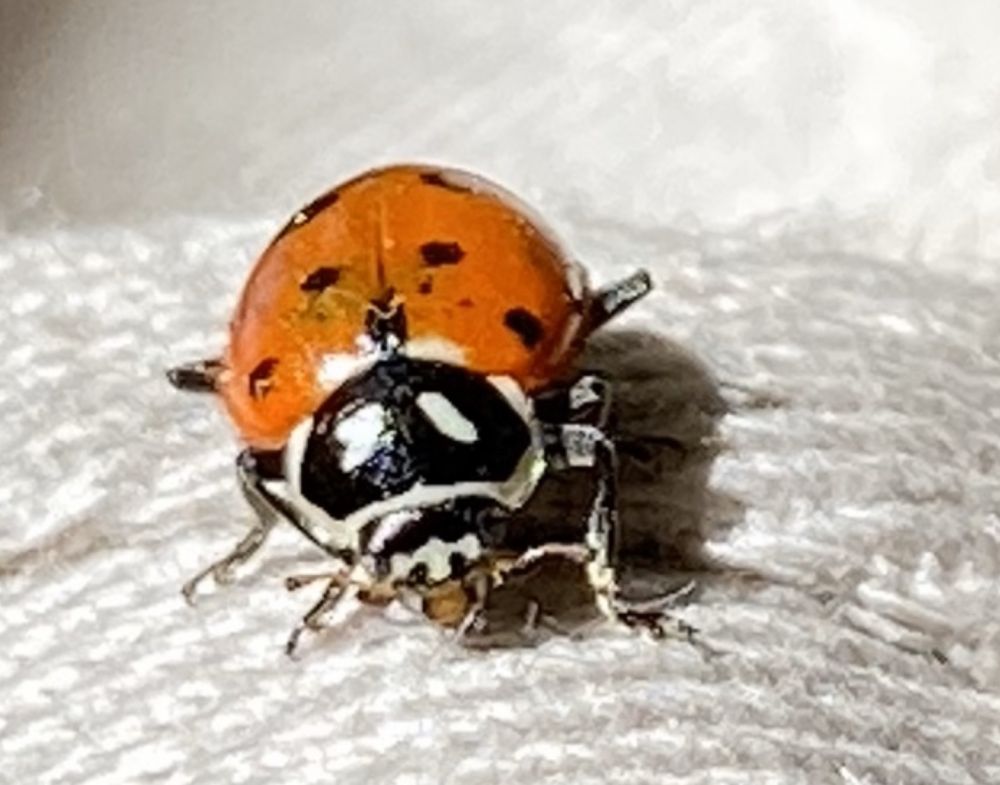
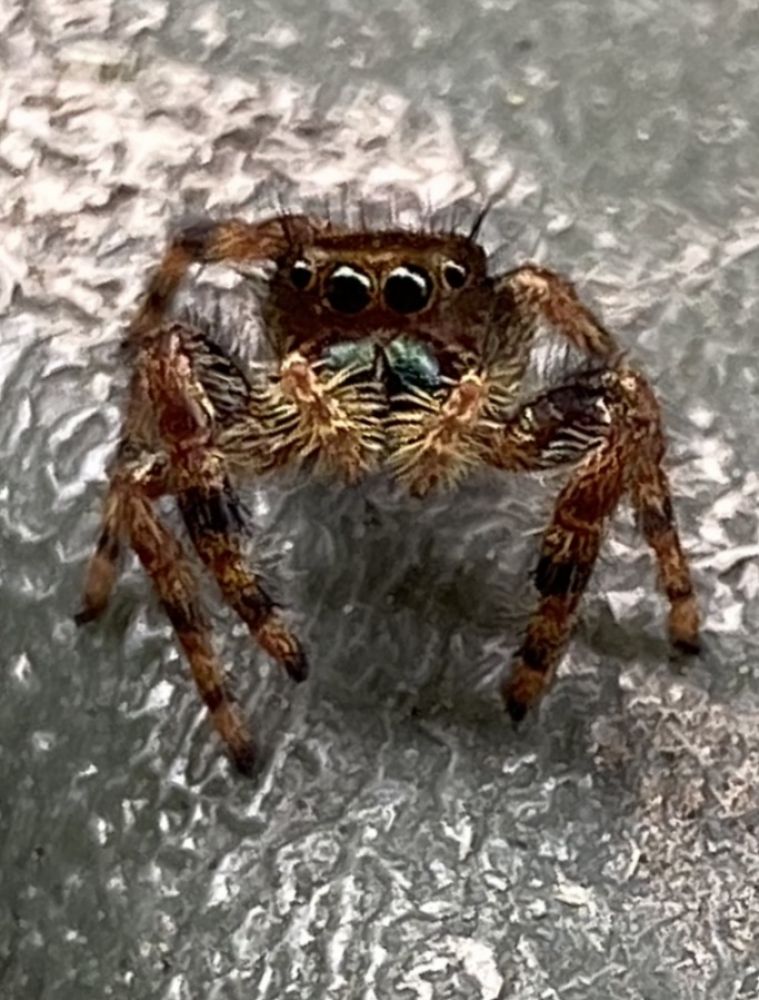
I used a tripod for indoor photos like my pin cushion shots, but for outdoor work it was really cumbersome to use a tripod for macro shots. Most of the outdoor shots I used an on-camera flash and covered the flash with a piece of paper to soften the light. That is what I used on all my outdoor shots except the mushrooms. That one I used a higher ISO and ambient light. I used a flash on the pin cushion shots but didn't use any diffusion. I was able to use an off-camera flash and change the direction of the light which gave it a different look.Sept 2019: added some bugs taken with my new iPhone 11pro. Not macro but simply cropped yet still looks good.
Processing
All photos were processed in Apple Photos app. Only minor adjustments to highlights and shadows were made.
Critiquing
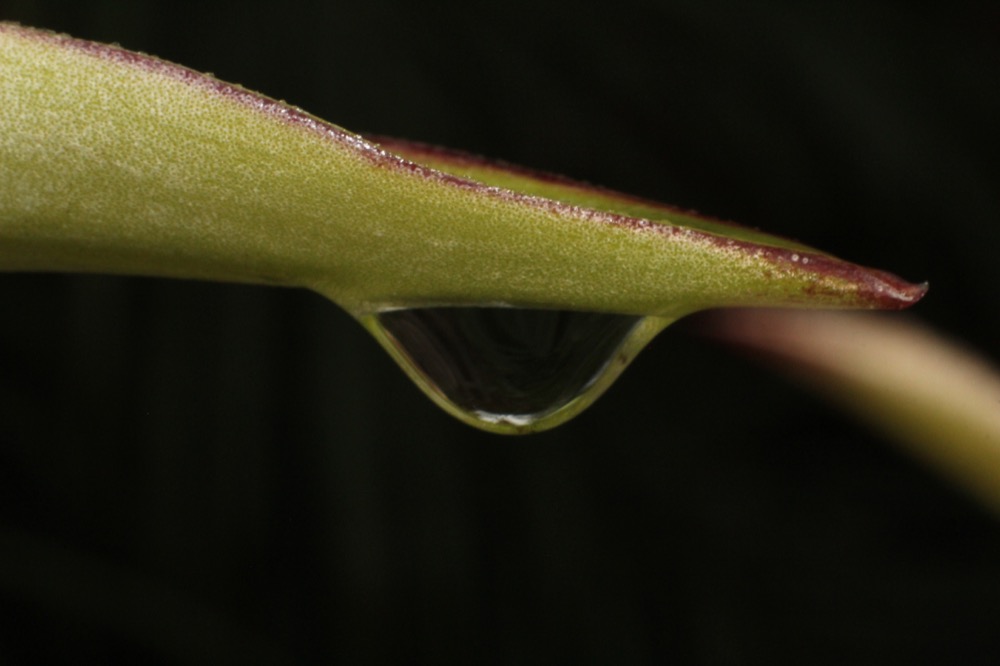
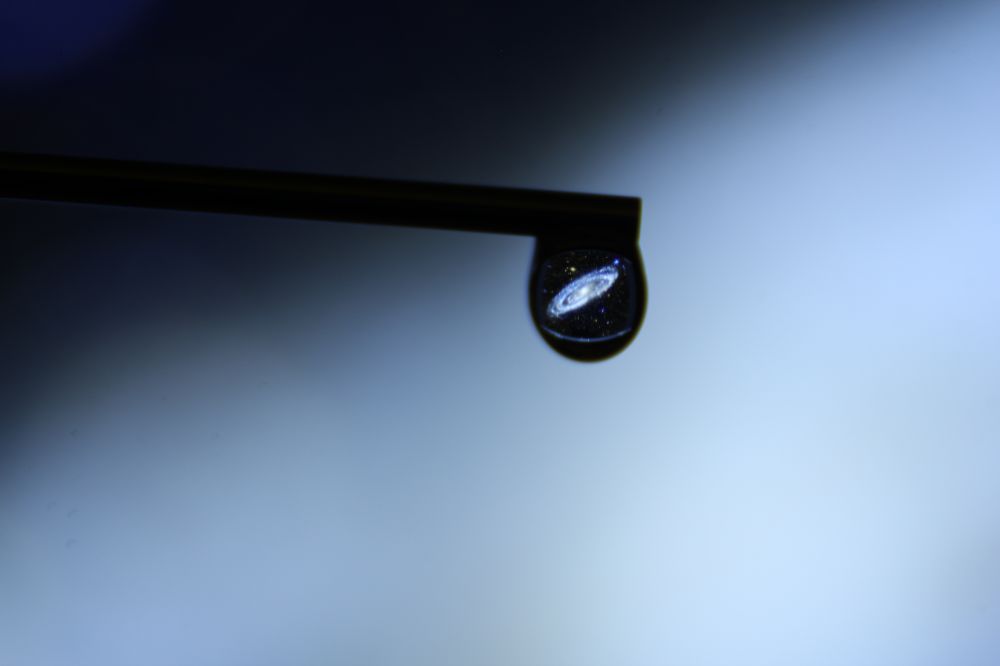
I liked the direct lighting on the straight pins and safety pins and the shots of the flowers looked better with a sheet of paper in front of the flash. I also liked the side lighting on the pin cushion shots. Unfortunately I didn't see any bugs where I could get a good macro shot. I saw a jumping spider and got a shot of him with my iPhone, I wanted to get a shot with my DSLR, but he jumped away and I couldn't find where he went. I hope to go on a hike nearby soon and get some bug shots. I did try to capture an image of the Andromeda galaxy through a water drop which I thought came out pretty good. I want to try that type of photography more in the future.